In April, I started doing the Complete Course in Professional Photography at the New York Institute of Photography. Last month, I shared my review of Unit 1 of the course and now that I just completed Unit 2, I am sharing my experience with you. It took me about 5 weeks to complete Unit 2 and my main takeaway is a better understanding of exposure and composition. These are really two key elements of a good photograph and I find myself being able to analyze photos that I see on the web and in magazines, and being able to pose a critical eyes on them now that I understand more these principles. I still need lots of practice to master all the new techniques I learned in Unit 2, but this Unit really opened my eyes to a new world of photography.
Unit 2 took a bit longer to go through than Unit 1 because it was very loaded with lots of technical information (some parts were even quite dry…but I understand that not everything about photography can be exciting). Unit 2 – Capturing the Image, was broken down into 7 lessons:
- Lesson 1. Image Capture: This lesson covered how an image is captured digitally or on film. We learned about the different types of memory cards, different types of film, white balance and ISO amongst other things.
- Lesson 2. Exposure: This was by far the longest, hardest but most valuable lesson so far in the course. Lesson 2 is filled with technical information on aperture, shutter speed, exposure brackets, camera metering, histograms, light meters and a lot of other tricks to get good exposure. This lesson alone probably took me about 3 weeks to read, but I definitely learned a lot of information that I have been putting in practice since. I really saw a huge shift in my understanding of good exposure.
- Lesson 3. Exposing and Developing Black and White Film: During this lesson, I learned how to develop black and white film with minimal equipment. It was quite an interesting read, but I tried to flip through it quickly because I don’t have any intentions of developing black and white film in the future. When I was in University, I used to go in the darkroom and developed my own black and white film, so it was a great refresher, but I dont think I will be doing that again. Now that we have digital cameras, I have no interest in handling chemicals to get my pictures developed.
- Lesson 4. Digital Processing: This lesson covered the principles of Image editing, file types and scanners. There were definitely some interesting parts, but there was a strong emphasis on scanners, which is not something I am looking to use now. However, I do understand the value of this information and will likely be very happy to flip back through this lesson when I need a scanner!
- Lesson 5. Filters: A very short and to the point lesson showing the various types of filters that exist out there, with examples of how each of them is used. This was a very captivating and quick lesson that I enjoyed.
- Lesson 6. Developing Your Eye: This was my favourite less of Unit 2. It covered composition and presented 12 guidelines to improve the composition of your photo. The concepts and guidelines really got me thinking about looking at a scene from different points of view to get the best composition. I have learned so many concepts that help me understand and better analyze pictures I look at. I can finally find the words to describe what is good and what could be improved in the composition of a shot. This is a lesson that I will definitely read over and over again to ensure that all the guidelines are really well embedded in my mind and can transpire in my photographs. This lesson was the basis for the photo project to be completed in Unit 2.
- Lesson 7. Essential Business Skills – Introduction to the Business of Photography: Each unit ends with a Business lesson. In this Unit, the business lesson covered starting up a photography business. The information really touched on the legal aspect of the photography business, such as different types of businesses, taxes, leases, privacy and photo release forms. I do not want to start a photography business right away, but this is something that I might be interested in a few years so this is definitely great information to read.
After completing all the lessons, I completed the open book multiple choice exam. I found the exam to be an excellent opportunity to go back through each lesson and review the information one more time. This helped make the information sink into my brain even more. I find that I need to see information 2-3 times to really remember it, and the open book exam is an excellent way to review!
Finally, I completed my Photography Project for Unit 2, in which I had to submit 3 photos to demonstrate that I can put in practice some of the techniques that I learned in that unit. In June, I went to visit my parents in rural Québec, so I took this opportunity to practice the new concepts I learned. The bonus is that my dad is also really into photography and I was able to borrow some of his great lenses. It was awesome to get to play with different lenses – I particularly loved his 70-200 lense!!!
I submitted the three pictures for my photo project and less than 3 days later, I received feedback. My instructor sent me 10 minutes of comments on my photos and I find his comments so constructive. He highlighted what I did well, but really goes further by outlining some tips and ideas to push the concepts even further. I truly enjoy this constructive criticism. Overall, I need to work on applying the rule of thirds and adding secondary subjects. Here are the photos I submitted:
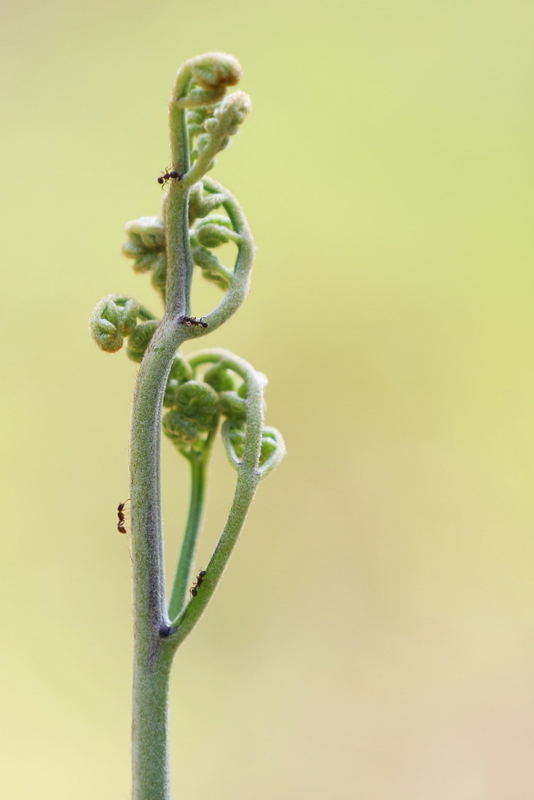
Photograph 1 – Focus attention on subject: For the first submission, I had to place a person or object to focus attention on the subject using two methods:
- place the subject up front so it is larger than everything else
- place the subject off-center, following the rule of thirds
One day, we went to the new piece of land that my parents got to build their cabin. It is currently forested so as I was walking around to check out the property, I saw some beautiful fiddleheads. There were ants marching up and down one of the fiddleheads so armed with my dad’s 70-200mm lense, I shot a close-up scene to check out the action. This was the perfect subject for this first photo: a fiddlehead that is larger than everything else in the background, and that is placed off-center, along one of the vertical line present in the rule of thirds. One of the comment of my instructor is that to make this picture even more interesting to the eye, I could have added a secondary subject in the background along the right vertical line. I will definitely try this next time.
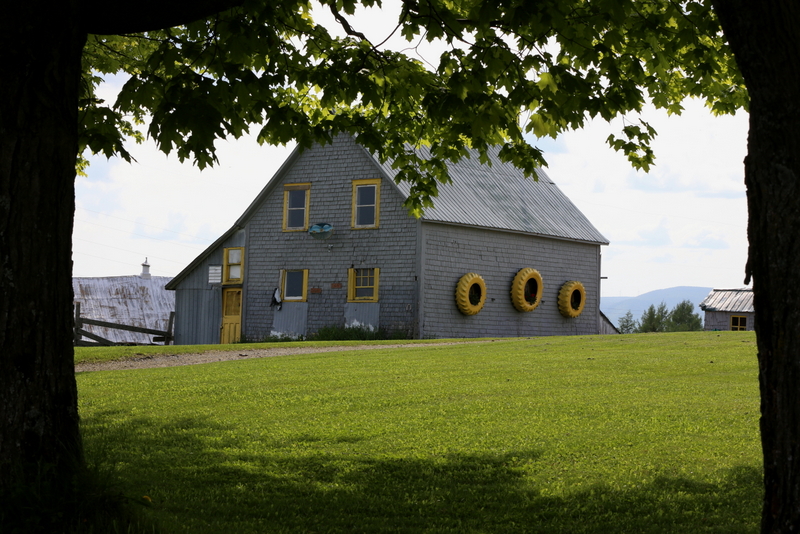
Photograph 2 – Framing: In this picture, I had to use framing to focus attention on the subject. When we were driving, we saw this really cute barn and we stopped just in between two trees to photograph it. The two trees are acting as a nice frame for the house. Unfortunately, I somehow did not feel like getting out of the car (I was tired from a long day in the sun and there were just so many flies biting me!), so the branches overlap with the roof. I should have stepped out of the car and lowered myself to get a better shot, and this is the main comment my instructor had to improve this photo. To get this shot, I used my 24-105mm lense at a 70mm focal legth, and set my camera in manual mode with f/16, shutter speed of 1/200 and ISO 400.
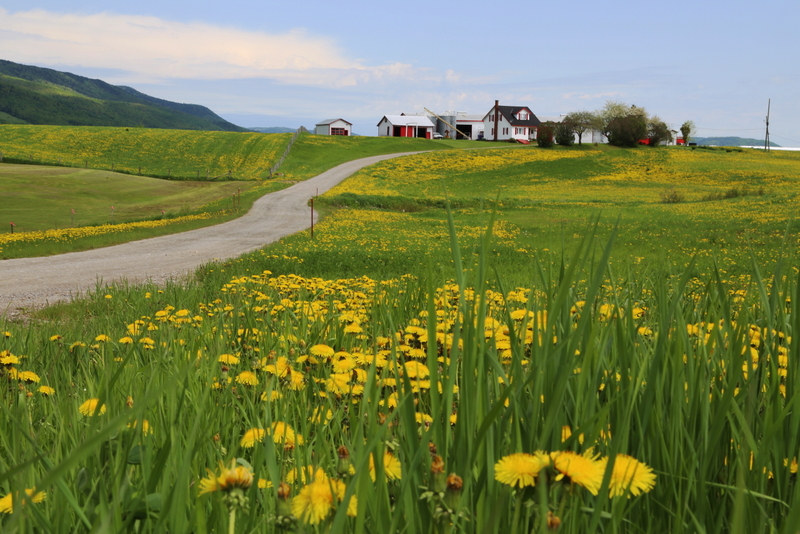
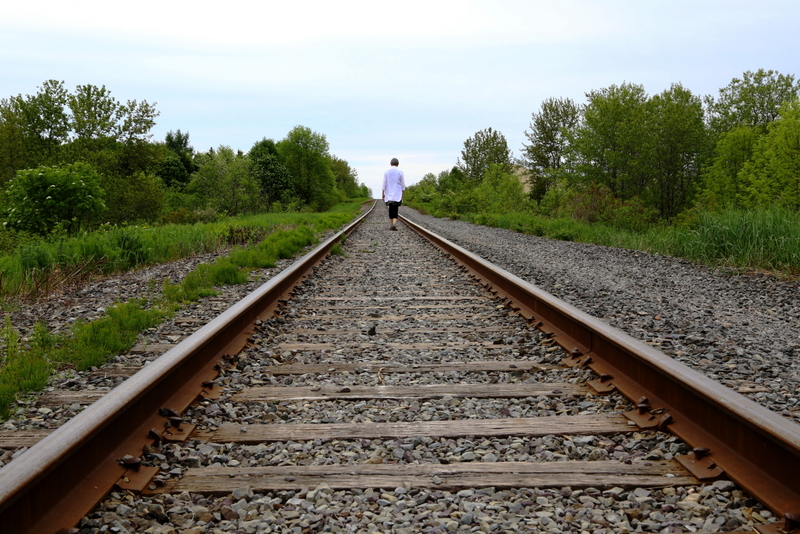
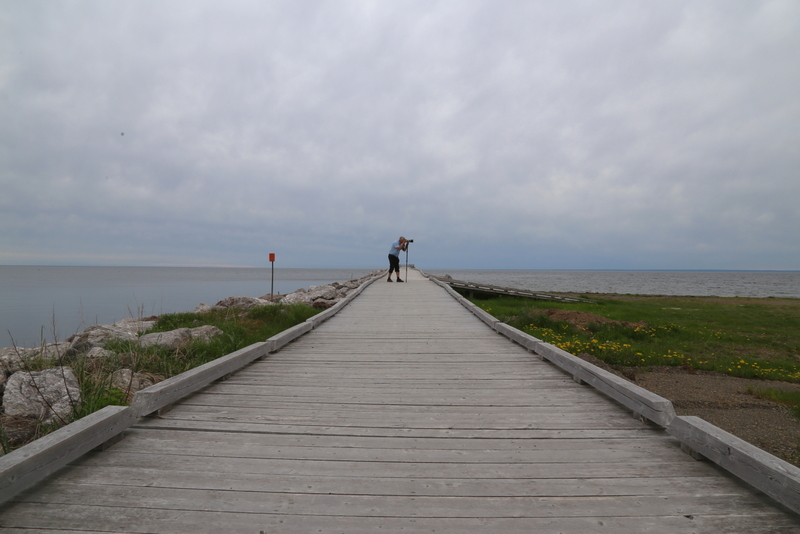
Photograph 3 – Converging Lines: I had a lot of fun practicing for this photo. We had to use converging lines to focus attention on a subject. I was having fun taking photos at the railway and with docks, but I ended up submitting one of a path leading to a farm house. I also tried to apply the rule of thirds in this picture, but the instructor gave me some great input on how I could have improved my application of the rule of thirds. The first picture below is the one I submitted, and I am also including one of my mom walking on the railway bed behind their house and my dad photographing birds on a dock. For the farm picture that I submitted, I set my camera at f/22, with a shutter speed of 1/30 to try and make everything in focus, all the way to the horizon. I was also using my 24-105mm lense set at 55mm.
I am loving this course and I really can’t wait to dive into the next Unit!! Unit 3 – Harnessing the Light.
If you are interested in learning about other sections of this course, here are the other units I completed and reviewed:
Unit 1 – You and Your Equipment
Note: This post is not sponsored. The opinions expressed in this post are my own.
Other Posts You Might Enjoy
 My NYIP Experience: The Complete Course in Professional Photography – Review of Unit 1
  My NYIP Experience: The Complete Course in Professional Photography – Review of Unit 3
  Vegan Umami or The Secret Fifth Flavour: A Review of Cooking Course at The Natural Gourmet Institute
 How to Start a Food Blog in 5 Easy Steps
 My Recipe Writing Process – How to Create Your Own Unique Recipes in 6 Easy Steps
 Glory Bowl with Roasted Edamame


Hi Ellie
Just reading your blog. So you really are enjoying the NYIP course? I sigh up about 10 years ago and never finished. Back then it seemed very dated. Now seeing your photos and reading your input ,it seems very different. I have taken on line courses from PPSOP,but I’m rethinking trying NYIP. Thanks for your blog!
Hi Martie, thanks for your comment. I am really enjoying it and am learning lots. I am not sure how much it has changed in the past 10 years, but I can tell you that I did not know how to use my camera in Manual before starting the course and now I can really control all the settings and have a much better understanding of the general rules of photography. I would definitely recommend this course, it is really helping me further my knowledge of professional photography and I love to learn about lighting and studio setting in the later units! There is so much to learn with photography and I love having the structure of a full course, with photo assignments in between to put your learning into practice. Hope this helps!
Thanks for the reply!
Nice photos. I have been thinking about taking the course at NYIP when they start up the Wedding and Portrait International Certification classes. Looks like it is a great school.
I noticed on the third photo (farm house) you had your settings at f/22, with a shutter speed of 1/30 so that you would have everything in focus. Do you think you could have just used Hyperfocal Distance for this shot? Then take the shot at f/14 to get a little more shutter speed and everything from 2ft from your camera to infinity would be in focus. That way you are closer to that sweet aperture f stop for sharp focus. (I think on the lens you listed ef24-105 f/4.0 has a sweet spot sharp focus of f/8) Just a suggestion. It is a really beautiful photo. I like how the path leads me into the photo and also the slope of the mountain on the left side coming into the farm house too.
Can’t wait to read more of your course reviews. Happy shooting