In April, I started doing the Complete Course in Professional Photography at the New York Institute of Photography. A few months ago, I shared my review of Unit 1 and Unit 2 of the course. Last week, I finally completed Unit 3 and am ready to share the overview of my experience to complete this lesson. It took me a lot longer than I anticipated to complete this unit because a lot happened in the past few months with the summer holidays and life in general. During this unit about lighting, I also wanted to really take the time to practice with different types of lighting and studio setups, which was something completely new to me. I did a few food photo shoots in my home studio and on site using floodlights. I got a speedlite and started playing with strobe lighting in my studio (living room) as well. I also took the time to build my professional food photography portfolio here, which was a super fun exercise in itself. For all these reasons, I took my time with Unit 3 because there was a lot of technical information that I wanted to practice in my studio.
Light is the true building block of photography and I believe is it really important to master lighting in order to become a great photographer. Through my food photography, I have played quite a bit with natural and available light, but have had limited exposure to artificial light. This unit provided me with some of the knowledge needed to understand the various types of lighting equipment and how to use them to obtain great results. After completing this unit, I feel a lot more comfortable with artificial lighting.
Unit 3 – Harnessing the Light, was broken down into 8 lessons:
- Lesson 1. Natural and Available Light: This lesson covered sunlight and available light and how to best capture it to give the desired effect/mood to your photograph. We looked in detail at light direction, colour, quality and also learned about night time photography.
- Lesson 2. Artificial Light – Continuous: In this lesson, we were introduced to continuous artificial light such as floods and spots and their characteristics (intensity, direction, quality and colour). I found this lesson very valuable because we learned how to set up a home studio at with basic equipment. During this unit, I set up a small studio in my living room and was able to get lots of practice done. This practical experience really helped understand the principles tought during this lesson.
- Lesson 3. Artificial Light – Flash: This lesson on flash was extremely complex and probably the most difficult of Unit 3. There were lots of numbers and calculations for using guide numbers, synchronization speed, ratios, outputs, etc. When I got my new Canon Speedlite and tried to play with it, I realized that these external flashes are quite complex and I will likely have to supplement what I learned in the course with additional readings and videos. I have also started re-reading this unit a second time to see if I missed any key elements that would help me use my Speedlite properly. I can do the basics but I feel that there is so much more that I haven’t completely grasped yet.
- Lesson 4. Travel Photography: This was such a fun and simple lesson that was very quick to complete. There was very interesting information about what gear to pack when traveling, how to prepare for airport and customs and how to protect your gear in extreme conditions (hot, cold, humid, rain). There was also information about how to get great travel photos that are different and unique, and finally tips on how to organize and process your travel photos.
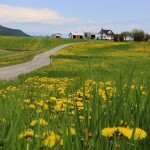
- Lesson 5. Landscape and Flower Photography: This lesson, similar to Lesson 4, was very interesting and quick to complete. In the landscapes section, we learned about lighting, reviewed information about depth of field, and touched on framing and converging lines. We also got some tips on shooting in different conditions such as sunset, fog, snow, water and waterfalls. In the second part, we learned about various ways of photographing flowers indoor and outdoors.
- Lesson 6. The Perfect Print: This unit was quite interesting and I surprisingly learned a lot of stuff I did not know about the different types of printing labs, colour, and even the different types of paper that are out there.
- Lesson 7. Essential Business Skills – Introduction to the Business Correspondence: I did not learn much new information in this unit on business correspondence, which mainly focused on how to write emails. I can see the value of it for people who do not have much experience in the business world. I did not learn much in this lesson, but it was very short, so it’s ok!
- Lesson 8. Optional – The Darkroom: I have to be honest here, I did not go through this lesson since it is optional and I am not planning to do any darkroom work in the near future.
After finishing all the lessons, I completed the open book multiple choice exam. I found the exam to be an excellent opportunity to go back through each lesson and review the information one more time. This helped make the information sink into my brain even more. As I mentioned in my previous posts, I find that I need to see information 2-3 times to really remember it, and the open book exam is an excellent way to review!
Finally, I completed my Photography Project for Unit 3, in which I had to submit 6 photos to demonstrate that I understand some of the lighting techniques that I learned in that unit. I submitted my pictures for the photo project and received feedback from my instructor about 3 days later. My instructor sent me 10 minutes of comments on my photos and I always find his comments so constructive. He highlighted what I did well, but really goes further by outlining some tips and ideas to push the concepts even further. I truly enjoy listening to his review and tips to improve even more. Here are the photos I submitted:
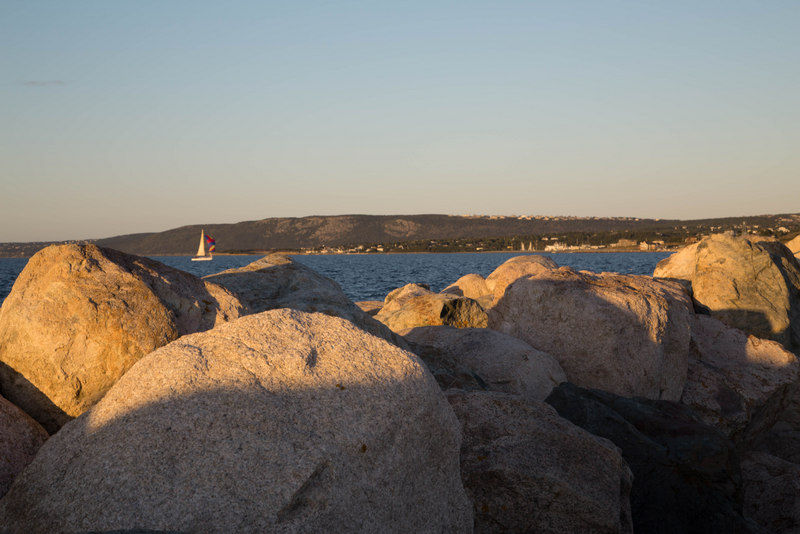
Photograph 1 – Direct Sunlight coming at 45 degree angle: For the first submission, I had to photograph an outdoor object (not a person) that was lit by direct sunlight coming at 45 degree angle. I went down the road one evening and took a few pictures of sailboats. On this picture, the sun lighting the rocks at a 45 degree angle. To take this picture, I used my 24-105mm lense at a focal length of 65mm, shutter speed of 1/100 and F-Stop of f/11.
Photograph 2 – Sidelighting: For this photo, I had to photograph an outdoor object (not a person) that was side lit by direct sunlight coming at 90 degree angle. Sidelighting is great to bring out texture in an object. I went under a bridge and was just amazed at how much texture that pipe had with the paint peeling. The sun was lighting at a perfect 90 degree angle so I captured a few shots and this one was my favourite. For this shot, I used my 24-105mm lense at a focal length of 85mm, shutter speed of 1/80 and F-Stop of f/11.

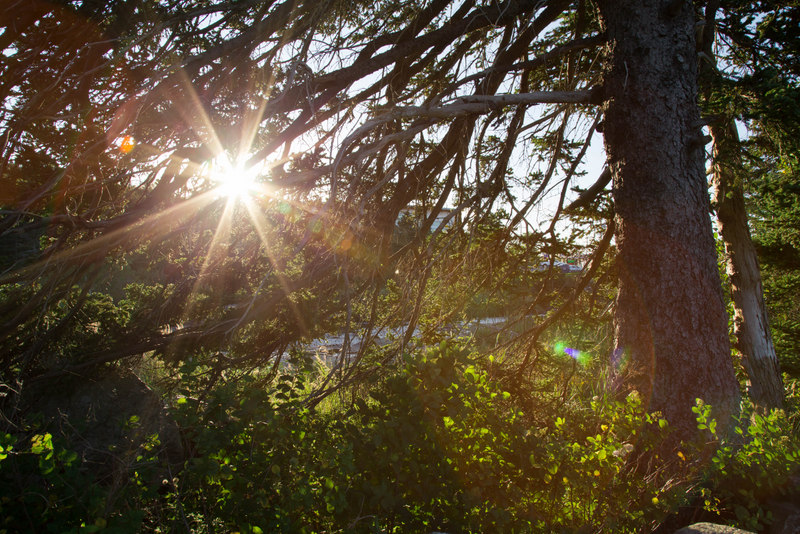
Photograph 3 – Backlighting: For the third picture, I had to photograph an outdoor object (not a person) that was enhanced by the effect of the sun coming toward the camera to backlight the object. I decided to photograph the sun coming through the branches of a tree, I like the effect and the transparency of the leaves that comes out – I will play around more with backlighting. To take this picture, I used my 24-105mm lense at a focal length of 24mm, shutter speed of 1/80 and F-Stop of f/11.
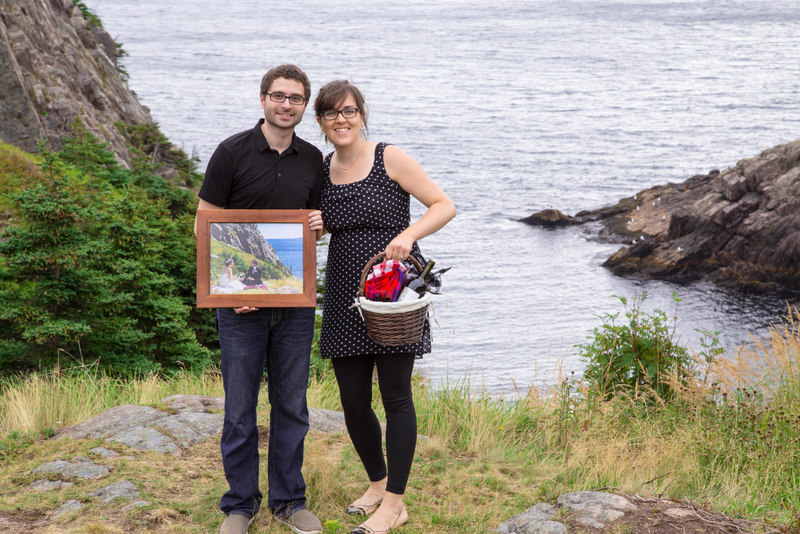
Photograph 4 – Diffused Lighting: For this picture, I had to take a portrait where the sun is diffused by clouds or shade. Our wedding anniversary was the perfect day for this – an overcast day with a bit of rain. We went back to the place where we had a picnic on our wedding day last year and took a picture in the same spot. This is a tradition that we will do every year, bringing the picture of the previous year with us to get a fun picture each year. To take this shot, I set my camera on a tripod with a timer. I used my 24-105mm lense at a focal length of 85mm, shutter speed of 1/60 and F-Stop of f/11.
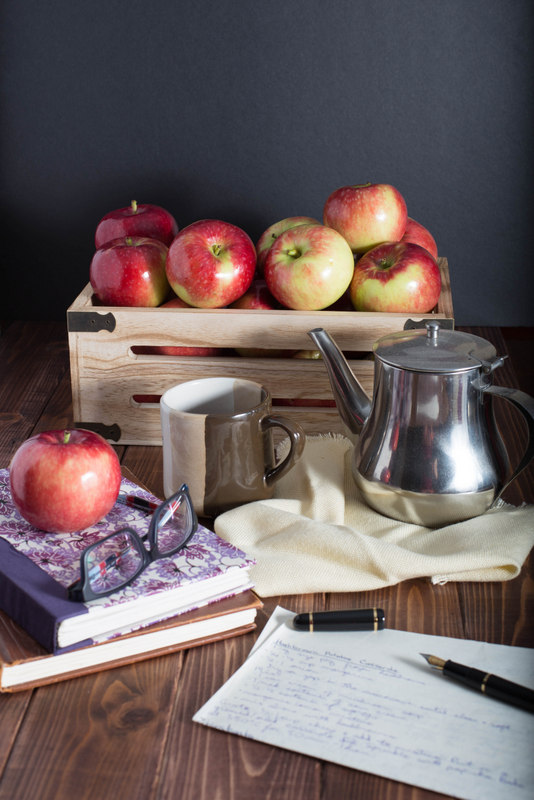
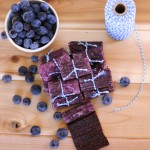
Photograph 5a – Still Life with 45 degree light: For this still life picture, we had to shoot a subject with 45 degree frontlight indoor or outdoor. I was so excited to have the opportunity to pick a subject that is related to my true passion: food photography! Since it is fall, I thought I would set up a still life with a basket of apple, my grandmother’s tea pot and some handwritten recipes. I lit up this picture using my Canon Speedlite 430 EXII diffused with a white umbrella that I placed 45 degrees to the right of my camera. I used my 50mm prime lense at a shutter speed of 1/200 and F-stop of f/8. I really enjoyed playing with the strobe for this shot!
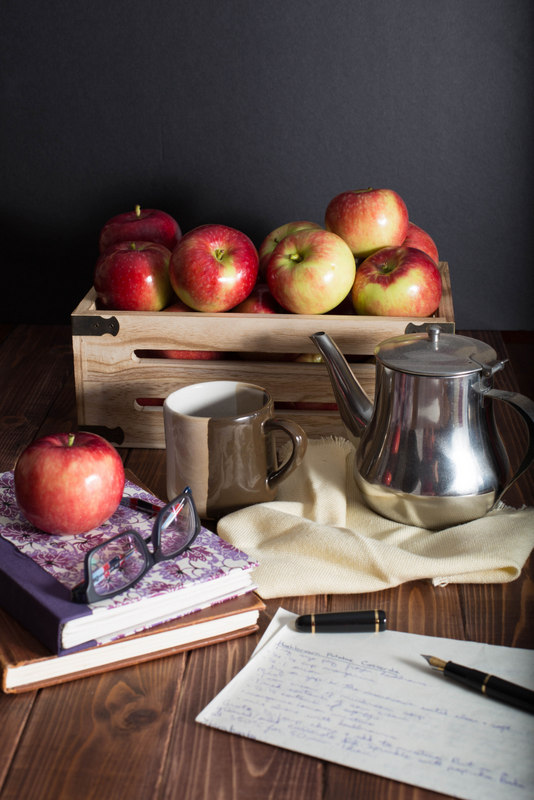
Photograph 5b – Still Life with Reflected Light: For this last picture, we had to use the same subject as above but add a reflector board to open up the shadows. In this case, I just added a white foam board to the left of the subject and you can see that the shadows are more open. The camera and flash are set up exactly the same as for photo 5a. It is pretty amazing to see how much light reflects off a white foam board! For this particular picture, I think I actually prefer the more moody look of photo 5a. What about you, which one do you prefer?
I am loving this course and as I write this, I am already through half of Unit 4 – Photographing People. This unit is so interesting! I get to practice a lot more with my studio setup and lighting equipment!! I can’t wait to share my next review with you!
If you are interested in learning about other sections of this course, here is my review of Unit 1 – You and Your Equipment, and Unit 2 – Capturing the Image.
Note: This post is not sponsored. The opinions expressed in this post are my own.
Other Posts You Might Enjoy
 My NYIP Experience: The Complete Course in Professional Photography – Review of Unit 2
 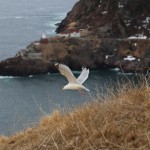 My NYIP Experience: The Complete Course in Professional Photography – Review of Unit 1
  Vegan Umami or The Secret Fifth Flavour: A Review of Cooking Course at The Natural Gourmet Institute
 How to Start a Food Blog in 5 Easy Steps
 Cream of Asparagus, Portobello and Black Truffle
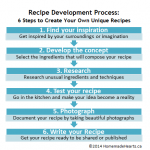 My Recipe Writing Process – How to Create Your Own Unique Recipes in 6 Easy Steps


Hi Ellie:
I was so happy to find your blog- I’ve been thinking about signing up for the NYIP course and was looking for reviews to try to assess whether it is worth the cost. You seem to be getting a lot out of it (your photos are great). Is the course you signed up for the newer format? (I notice that NYIP now doesn’t send out CD/DVD’s and charges a separate fee for the printed materials). Does NYIP still give out a student press pass?
Good luck with the rest of the course and I’ll look forward to your next post on NYIP!
Kind Regards,
Sarah
Hi Sarah, so glad you enjoyed my review! Yes, I did sign up for the newer format, meaning that the course is entirely online. I did not purchase the extra printed materials and I have to say that I don’t regret it so far. The course is very well laid out online and it is super easy to pick up where you left off. I received a student press card with the welcome papers and also a white umbrella, which is awesome for lighting! I haven’t had an opportunity to use the press card yet, but hopefully will put it to use soon I should post my Unit 4 review soon, I still have to take a few pictures for the assignment but have completed the reading and exam… Let me know how your course go if you start it! Good luck
Hi Ellie,
I stumbled upon your blog because I’ve been debating about whether to take the NYIP course. I think you’ve sold me. My biggest fear is how creative I can be because I don’t think that side of my brain works as well. Also, I’m busy working full time with 2 young daughters and not a lot of equipment. But, after reading your posts and comments about each lesson, I think I should take the chance and do this. Thanks for your blog and I’ll be sure to follow up with the rest of your progress. Maybe I’ll start a blog myself.
Thanks,
Mike
Hi Mike, I completely agree that sometimes, it is hard to fit it all in, but if you are really interested in photography, I would definitely recommend that you jump in I have been doing the course in my spare time: listening to a lesson while I do dishes and reading a few pages on my ipad before going to bed. I have really seen my photography improve over the past months and I am loving the challenge of having an assignment, and trying to find a subject to shoot. This definitely helps with the creative side, because you have to demonstrate a skill that you have learned so you just have to go out and practice! Plus, we have 3 years to complete the course, so it is totally reasonnable. I started the course about 9 months ago and I am 2/3 of the way in. I am hoping to complete the course within the next 6 months, we will see if that happens
  Let me know if you start the course! Good luck!
Hi Ellie. I went ahead and took the plunge. I purchased the course and just finished section 1.1. Like you, I’m trying to find time to squeeze in more lessons, but I nibble at it a little here and there. I must say, that I do find myself looking around my environment more from a photography standpoint now. Although I may not have my camera with me, I’ll look at things and imagine if I were to take a picture, what would my subject be and what I can do to simplify the surroundings to draw my viewer’s eyes to the subject. Of course, I just started so I can look at stuff, but I don’t know how to execute yet. But, I never looked or thought like that before, so I’m definitely encouraged. Thanks for your encouragement and keep up the great work.
Mike
This is so great to hear Mike! So happy for you that you took the plunge This is so true, I find that since I started the course, I see light and stuff around me in a much different way! Always thinking about composition and great pictures that I could take, even when I don’t have my camera with me 😉 This course has been so helpful! Hope you enjoy it as much as I do! Keep me posted on how your progress goes – you should start a small blog to post some of your pictures, I find it fun to go back and see my own progress!
Hi Ellie,
Sorry for the long delay, but I finally finished off all the lesson 1 lessons and now need to work on my photo project. Today was my first day in the field, but it was really short because I had my family in tow and running errands was my first priority. I don’t think it well as well as I hoped. I’m still struggling with what I think my subject should be, but it’s also so cold that I found my fingers freezing over pretty quick. I may have to set up some stuff in the house to complete some of these assignments. When I think I have something to show, I’ll let you know.
As for starting a blog, I’m thinking about it, but not really sure what I want to blog about. I guess I can blog about my struggles and post pictures, but I don’t really have a theme like you seem to have.
I appreciate any suggestions you may have. Have a great one!!
Wow Mike, you completed the first part of the course quickly! It can definitely be challenging to take pictures in the cold! The key is that you should not try to get all your pictures in one day, because sometimes, things just get out of control, like weather or family obligations. You should take your time to play with your camera and make it fun! Don’t be afraid to take your camera out with you a few times before reviewing your pictures and selecting the ones you want to submit for an assignment.
As for a blog, you could definitely put one about your photo tips, stories and progress But don’t do it if you don’t feel like you have the time, you don’t want this to become a chore
  Enjoy!!!
Ellie,
I think my main hesitation with a blog/website is a centralized theme. I see yours and it’s focused. I have ideas, but they’re all over the place right now. I definitely want to blog about my photos, NYIP, and maybe provide product reviews, but I don’t think I have the technical acumen to review cameras and accessories. I’m definitely interested to do it. I’ll probably have to pick your brain.
I totally agree with the photo assignments. I’m not trying to do them all at the same time. I’m new to my area so I’m trying to explore and still find good subjects. I’ll keep working on it ad keep you updated.
Hi Ellie,
I took the dive and created a blog. Here’s the website: michaelhcheng.com
I definitely need more content, but it’s still a work in progress. I completed Unit 1 and will be posting pictures of it soon. I also am writing a review of the course. I’m hoping others will find our reviews helpful in their decision for a photography course. I know after reading yours, it convinced me to take the plunge on NYIP. Thanks for the help and I hope you’ll follow my blog.
Mike
Hi Mike! So glad to hear that you have taken the plunge! This is awesome! I checked out your blog and love the photos you took for your first assignment! Keep up the great work!
Ellie,
Did you purchase a lighting kit? If so, what type of kit? I’m debating between a continous or a strobe kit. I definitely want to get more hands on with lighting and I imagine doing more studio stuff in the future, but I don’t want to invest heavily into it yet. I think the learning curve is easier with continous, but everything I’ve read says strobe kits are the way to go for the intensity and quality of light they provide. What are your thoughts?
Excellent still life photos. I like how you added the white foam to photo 5b for reflective light. It is amazing how much light something white will reflect. As a wedding photographer, one time I forgot my reflector when the bride was getting ready at the hotel. I just grabbed a pillow with a white pillow case on it and used it as a reflector. I now use a white sheet in my studio if I need a little more reflective light from another different.
I looked at your portfolio of the food photography. Great shots there. Keep it up.
Thanks for your comment Fallesen! It is incredible indeed what a white piece of fabric, cardboard or reflector can do to illuminate a picture! It is great that you were able to find a solution when you were shooting your bride Great idea for the white sheet in the studio!
Is the course material downloadable for future review?
Hi Becky, I don’t think you can download the course, you have to be connected to internet to access it. However, you can get the printed materials and therefore have access to the course at all times. Hope this helps!
HELLO! Thank you for sharing your experiences with NYIP… How are you doing? is Unit 4 difficult?
In a couple of months I’ll enroll in NYIP :)))
Cheers!
Hi Sylvia! I am still loving the course! I completed the exam for Unit 4 and then just had to take a few month off due to travels and holidays! I am hoping to work on my photo project in March so I will hopefully post the results soon good luck to you with the course!
Hi Ellie! Like Sylvia, I am thinking about signing up for the NYIP course soon and have been enjoying your blog and review. How is your progress with Unit 4 going? I am excited to see your results and read about your experiences with that Unit.
Hi Ellie.
You have just help me make up my mind about joining NYIP. I live in South America and I found your blog just in time.
Thank you.
Alfonso
PS. Love your portfolio